
6 Tips for Organizing Sketched Artifacts

This article was originally published on the Eightshapes website on July 13, 2012.
Sketches enable us to quickly depict and share ideas with each other, but are also considered disposable. Sketches represent an intermittent state leading to something better, more refined. As artifacts, they are fleeting renditions of the concept, a point in time idea dismissed into the (ideally recyclable) waste baskets of sketching sessions and desktop brainstorming.
Sketches Live On. But How, and How Long?
The more EightShapes sketches, however, the more we desire to retrieve and share those ideas later-to revisit abandoned, complex, or unrealistic notions of a better experience, to remind ourselves of passing ideas.
We may find ourselves amid the next hour’s design studio summation. Or the day’s prototyping. Or the next week’s task scoping. Or the next quarter’s project proposal. But the sketch’s value extends beyond the initial presentation and discussion.
As such, we’ve adopted techniques for organizing our sketches for future reference, even into the annals of antiquity!
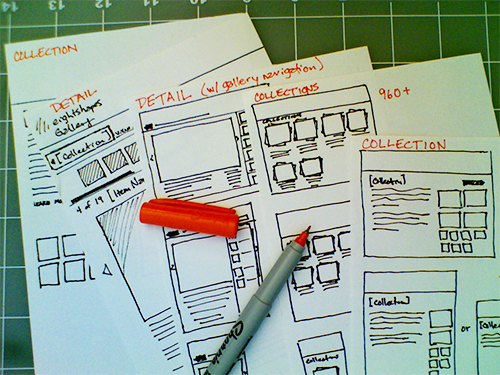
1. Title Sketches with an Alternative Color
Consider labeling each sketch with a title, often of a page or page state. For design studios that result in copious sketches, also consider author name and round number. Use a unique color for these labels, to make them stand out. For EightShapes, unsurprisingly, that’s orange.
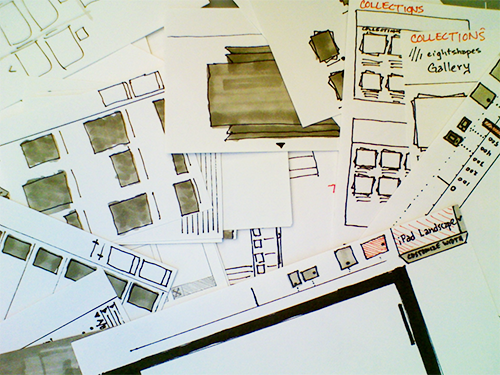
2. Group and Label Sketch Stacks
Ever seen this morass of sketches at the end of a brainstorming session? Bless the heart of the design lead faced with the chore of cleanup and consolidation.
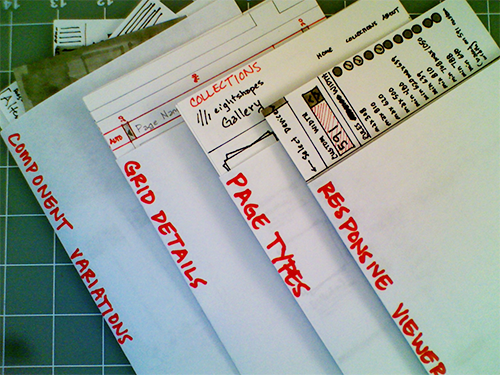
When accumulating sketches from a brainstorming session, be deliberate about how you stack sketches together. Rubber bands generally stink (sketch paper may vary in format and size or even be ripped apart), paper and binding clips work better, and manila folders work best but can be expensive.
Our preferred low-fi solution? Fold an 8.5” x 11” (or A4) sheet of paper in half, write a big label on top of it, and you’ve got a makeshift storage device. Stuff those stacks in your bag or on your desk for the duration of a project.
Another idea my partner Dan may try: use sticky notes or even tabs to highlight or even group items or groups!
3. Snapshot Sketches as Digital Images
Whether sketching alone, as a group in a studio setting, or collaboratively with remote teammates, you can photograph individual sketches, grouping the digital files in folders by author or by project phase. Our favorite tool: the handy IPEVO Point-2-Camera we espoused in last year’s post Sharing Sketches Remotely.
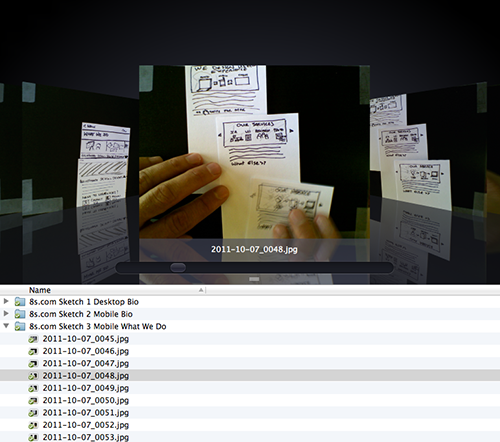
Once digital, sketches become more portably sharable and quicker to sift through without the fussy, natural mess. Even better: snapshot them via the IPEVO as each sketcher presents.
4. Snapshot Varied Sketched Sequences as Flows
Instead of snapshotting just single sketches, you could also consider using sketched pages, photographed as flows.
Ideally suited to smaller sketches on index cards, the easiest place to move sketches around is a table. However, you can also use the h2 adhesive of draft dots or punctures of push pins to reorient sketches on a wall and photograph them there. Or, heck, just leave them up as a living artifact to plan against.
5. Yup, Group and Label Sketch Snapshots
That said, we’ve sketched so much at such high volumes that a folder of images becomes impenetrable. It’s nearly impossible to find what you want, or discern who composed it, or even know what the subject material was.
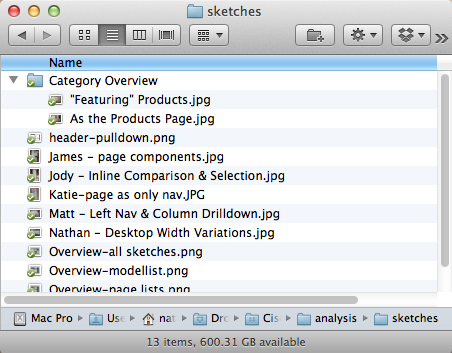
Therefore, take a moment to rename image files with commensurate titles, incorporate authors or rounds systematically, or even automate the process of folders or subsets of files using apps like Mac’s Automator.
Wanna get serious? You could use a digital asset or photo organizer like Mac iPhoto or Adobe Bridge. We apply keywords and other metadata to our valuable project screenshots there. But we’ve never tread there for sketches. That’s a bit overkill.
6. Know When to Let Go
All of these techniques—particularly, digital storage—can capture our great ideas forever. However, it’s not time to upgrade your Dropbox or Amazon Web Services account to handle a terabyte of sketch images. Instead, if the sketches have aged and the project has concluded, take the extra two or three seconds to discard those overaged stacks from your messy desk or untidy project folders. Sometimes, a clean space is just what you need to clear your mind and come up with the next great idea.
UX Leadership and Influence program
(Formerly called the How to Win Stakeholders & Influence Decisions program.)

Our 16-Week program guides you step-by-step in selling your toughest stakeholders on the value
of UX
research and design.
Win over the hardest of the hard-to-convince stakeholders in your organization. Get teams to
adopt a
user-centered approach. Gain traction by doing your best UX work.
Join us to influence meaningful improvements in your organization’s products and services.
Learn more about our UX Leadership and Influence program today!